【第4章】 三个域对象
参考视频:SpringMVC教程,SpringMVC从零到精通,老杜SpringMVC,动力节点SpringMVC
1. Servlet中的三个域对象
请求域:
request会话域:
session应用域:
application
三个域都有以下三个方法:
1 | // 向域中存储数据 |
主要是通过:setAttribute + getAttribute 方法来完成在域中数据的传递和共享。
1.1 request
接口名:HttpServletRequest
简称:request
request对象代表了一次请求。一次请求一个request。
使用请求域的业务场景:在A资源中通过转发的方式跳转到B资源,因为是转发,因此从A到B是一次请求,如果想让A资源和B资源共享同一个数据,可以将数据存储到request域中。
1.2 session
接口名:HttpSession
简称:session
session对象代表了一次会话。从打开浏览器开始访问,到最终浏览器关闭,这是一次完整的会话。每个会话session对象都对应一个JSESSIONID,而JSESSIONID生成后以cookie的方式存储在浏览器客户端。浏览器关闭,JSESSIONID失效,会话结束。
使用会话域的业务场景:
- 在A资源中通过重定向的方式跳转到B资源,因为是重定向,因此从A到B是两次请求,如果想让A资源和B资源共享同一个数据,可以将数据存储到session域中。
- 登录成功后保存用户的登录状态。
1.3 application
接口名:ServletContext
简称:application
application对象代表了整个web应用,服务器启动时创建,服务器关闭时销毁。对于一个web应用来说,application对象只有一个。
使用应用域的业务场景:记录网站的在线人数。
2. request域对象
在SpringMVC中,在request域中共享数据有以下几种方式:
- 使用原生Servlet API方式
- 使用Model接口
- 使用Map接口
- 使用ModelMap类
- 使用ModelAndView类
2.1 使用原生Servlet API方式
1、新建一个模块(步骤参考前面模块),创建 IndexController 和 index.html,代码如下:
1 |
|
2、创建index.html并添加超链接:
1 |
|
3、在Controller的方法上使用HttpServletRequest:
1 |
|
4、创建view.html页面:
1 |
|
5、启动服务器,测试结果:
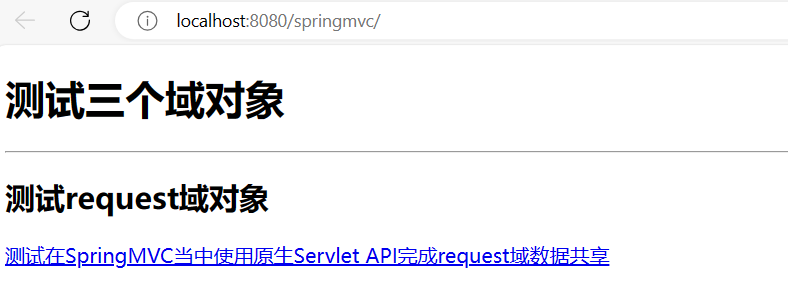
6、点击链接后成功跳转,并且携带数据:

这种方式当然可以,用SpringMVC框架,不建议使用原生Servlet API。
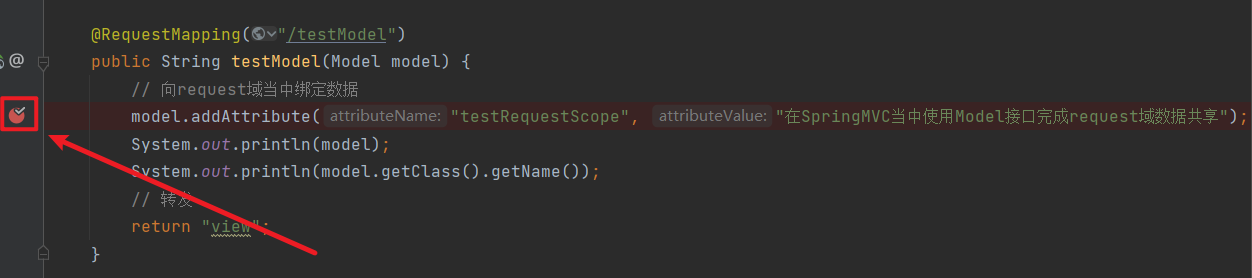
2.2 使用Model接口
1 |
|
在index.html页面添加超链接:
1 | <a th:href="@{/testModel}">测试在SpringMVC当中使用Model接口完成request域数据共享</a><br> |
2.3 使用Map接口
1 |
|
在index.html页面添加超链接:
1 | <a th:href="@{/testMap}">测试在SpringMVC当中使用Map接口完成request域数据共享</a><br> |
2.4 使用ModelMap类
1 |
|
在index.html页面添加超链接:
1 | <a th:href="@{/testModelMap}">测试在SpringMVC当中使用ModelMap类完成request域数据共享</a><br> |
Model、Map、ModelMap的关系
可以在以上Model、Map、ModelMap的测试程序中将其和其类名输出,看看输出什么:
1 | {testRequestScope=在SpringMVC当中使用Model接口完成request域数据共享} |
通过输出结果可以看出,无论是Model、Map还是ModelMap,底层实例化的对象都是:BindingAwareModelMap
可以查看BindingAwareModelMap的继承结构:
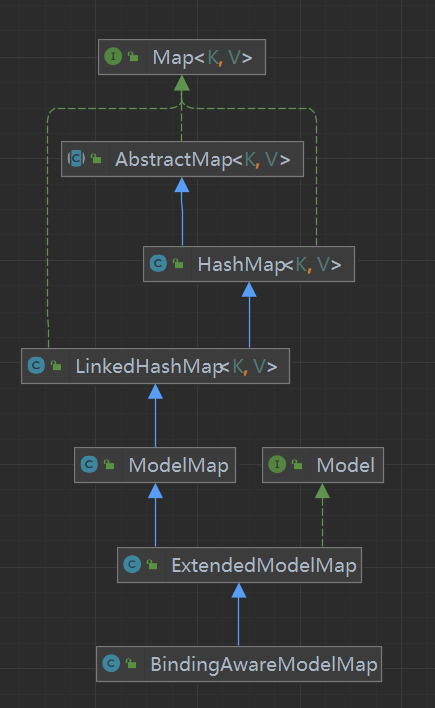
通过继承结构可以看出:BindingAwareModelMap继承了ExtendedModelMap,而ExtendedModelMap又继承了ModelMap并且实现了Model接口。ModelMap顶层又有一个Map接口。因此表面上是采用了不同方式,底层本质上是相同的。
SpringMVC之所以提供了这些方式,目的就是方便程序员的使用,提供了多样化的方式,可见它的重要性。
2.5 使用ModelAndView类
在SpringMVC框架中为了更好的体现MVC架构模式,提供了一个类:ModelAndView。这个类的实例封装了Model和View。也就是说这个类既封装业务处理之后的数据,也体现了跳转到哪个视图。使用它也可以完成request域数据共享。
1 |
|
在index.html页面添加超链接:
1 | <a th:href="@{/testModelAndView}">测试在SpringMVC当中使用ModelAndView类完成request域数据共享</a><br> |
这种方式需要注意的是:
- 方法的返回值类型不是String,而是
ModelAndView对象 - ModelAndView不是出现在方法的参数位置,而是在方法体中new的
- 需要调用addObject向域中存储数据
- 需要调用setViewName设置视图的名字
ModelAndView源码分析
以上我们通过了五种方式完成了request域数据共享,包括:原生Servlet API,Model、Map、ModelMap、ModelAndView。
其中后四种:Model、Map、ModelMap、ModelAndView。这四种方式在底层DispatcherServlet调用我们的Controller之后,返回的对象都是ModelAndView,这个可以通过源码进行分析。
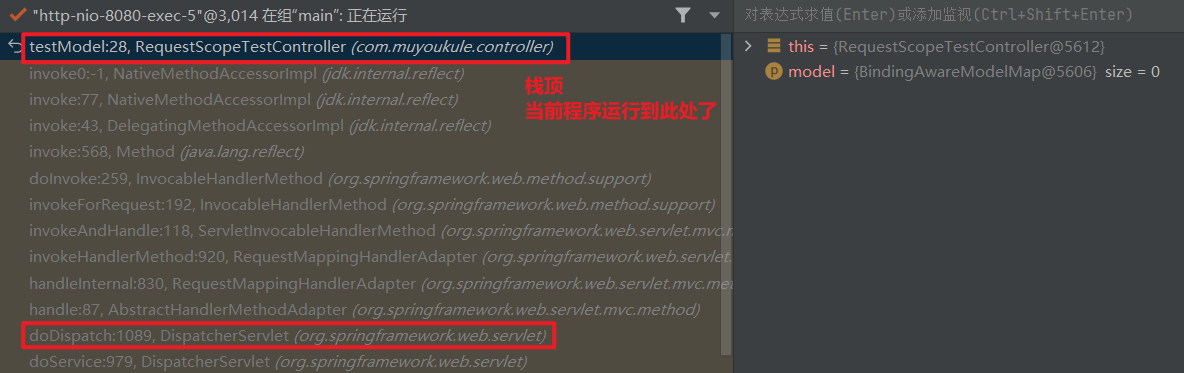
在以上四种方式中,拿Model举例,添加断点进行调试:
debug模式启动服务器,发送请求,走到断点:

查看VM Stack信息:
查看DispatcherServlet,源码如下:

可以看到这里,无论你使用哪种方式,最终都要返回一个ModelAndView对象。
PS:大家可以通过以下断点调试方式,采用一级一级返回,最终可以看到都会返回ModelAndView对象。

3. session域对象
在SpringMVC中使用session域共享数据,实现方式有多种,其中比较常见的两种方式:
- 使用原生Servlet API
- 使用SessionAttributes注解
3.1 使用原生Servlet API
1 |
|
在view.html视图页面添加:
1 | <div th:text="${session.testSessionScope}"></div> |
index.html添加超链接:
1 | <h2>测试session域对象</h2> |
3.2 使用SessionAttributes注解
使用@SessionAttributes注解标注Controller:
1 |
|
PS:SessionAttributes注解使用在Controller类上。标注了当key是 x 或者 y 时,数据将被存储到会话session中。如果没有 @SessionAttributes注解,默认存储到request域中。😅
在view.html视图页面添加:
1 | <div th:text="${session.x}"></div> |
在index.html页面添加超链接:
1 | <a th:href="@{/testSessionAttributes}">测试在SpringMVC当中使用@SessionAttributes注解完成session域数据共享</a><br> |
4. application域对象
在SpringMVC实现application域数据共享,最常见的方案就是直接使用Servlet API了:
1 |
|
在view.html视图页面添加:
1 | <div th:text="${application.testApplicationScope}"></div> |
在index.html页面添加超链接:
1 | <h2>测试application域对象</h2> |